A heavy influence in my design style is earthy and natural/organic materials. One trend you may see popping up more and more is that old world finish. Stones, limewash, plaster, concrete, woods, etc. these materials not only add so much visual interest they create a story rich with history. One of my favorite parts of design! So obviously I’ve been just waiting for the perfect space to add more of that old world style to.
One way to get that velvety, sophisticated yet minimal look is with Venetian Plaster. Keep reading for a full tutorial to easily DIY it yourself, and more about how this trend has been around for years yet isn’t heading out any time soon!

VENETIAN PLASTER
Traditional Venetian Plaster was created to mimic the look of real stone made with pigmented lime paste or marble fragment dust. Now, it’s seen a heavy resurgence thanks to a blend of modern and traditional design styles. With it’s popularity there’s now several variations to use whether synthetic plaster or DIY. Another perk: eco friendly material and no odor, also can get it tinted in nearly any color! It’s applied with a block brush or masonry brush and you create cloud like movement over the surface.

For this tutorial I’m not using a specific Venetian Plaster product I’m achieving the look DIYing my own. I’ve used Ardex Feather Finish for my concrete fireplace and vent hood, loving those results I knew I could get a very similar finish to Venetian Plaster using this with a different method.

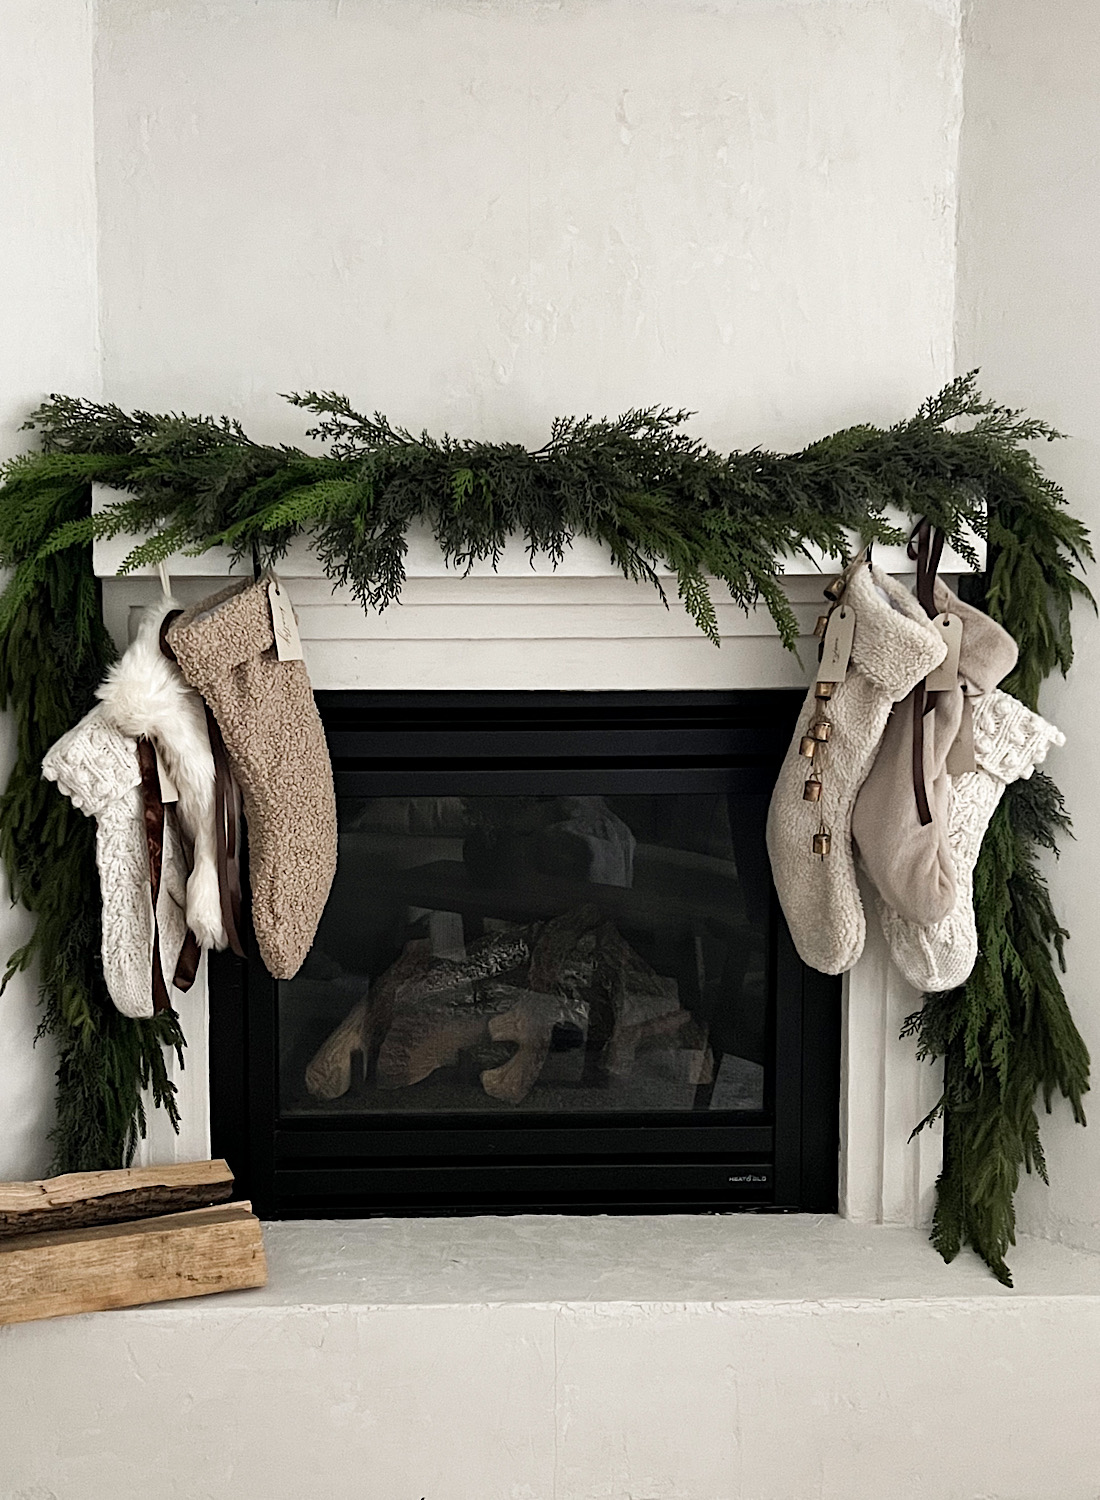
We also transformed our existing fireplace surround by removing the wood mantel, and adding a stacked design using 1×2, 1×3, and a thicker mantel top with 1×6 boards. I wanted my mantel top piece to be less wide but part of our previous mantel was cemented in and we had to recover that.

This was after sanding the painted brick. Prior to that I had given the brick the old German Schmear look thanks to Chip and Jo circa 2016.


My first obstacle was covering my existing brick. To do this method or use a Venetian Plaster product it goes best over a smooth surface. Ideally, if you have a rough surface you’d want to either skim coat or resurface whatever it is (drywall, cement board, whatever is necessary for your application).

We skim coated the brick with joint compound and it took several coats and lots of sanding. For the final skim coat I used the Ardex feather finish to cover my brick grout lines better. In hindsight I’d take the additional steps and time to coverup the brick to start with.
Finally, after that was dry and a light wet sand my last two coats were applied with the feather finish to achieve my plaster finish. Here’s how to use Ardex Feather Finish for a DIY Plaster.

DIY PLASTER USING ARDEX FEATHER FINISH
-MIX FEATHER FINISH & WATER IN A 5 GALLON BUCKET, STARTED WITH 3 CUPS FEATHER FINISH, 1.5 CUP WATER.
-ADD PAINT, STARTED WITH 1/3 GALLON

May have to adjust the measurements depending on the consistency you get. You want pancake batter consistency. Not too runny but not super thick. It does dry in the bucket quickly and requires continuous stirring and for you to move quickly when applying. My fireplace took 2 coats and about 3 hours to do.
Use a plastic trowel and apply using Xs and circular motions, keep a wet edge so it continues the movement and doesn’t dry darker.
*see a video of this on IG here- DIY PLASTER FIREPLACE VIDEO

It’s really simple once you get going and find a groove with the application. Be sure to use a combination of X’s and more rounded S or circular motions with the trowel to feather it out.
This method creates a mostly smooth surface some areas may have slight raised texture. The result is a cloudy velvety soft movement that is absolutely gorgeous! I used the color Benjamin Moore Pale Oak in a flat finish. I love this color. I may have chosen after seeing it complete a slightly darker color by one shade, but with the added texture my fireplace has it is really beautiful. It compliments my wall color, BM White Dove nicely. It’s very subtle which is what I wanted for this project!

ADDITIONAL NOTES
-You can wet sand any raised texture spots you do not want
-The lighter paint color you choose the lighter your overall plaster finish will be. Consider a shade darker because the feather finish lightens the paint color slightly.
-Some surfaces may require 3 coats.
-Don’t mix all of your product and paint at once. Do it in stages so you don’t waste product and have it dry out on you.
-You must use the white feather finish because the powder does slightly lighten the paint color. The cement/gray color will obviously impact your finished color.
-The paint needs to be in flat or matte for best results. You do not want any sheen.
-My fireplace has a little more texture than you would if you applied over a smooth surface to start. It really is important if you don’t want raised texture.


SHOP SUPPLIES

If you try this technique out I’d love to see how it looks and share your space if you tag @graceoaksdesigns on IG! Be sure to pin any of the above photos to save this tutorial for later. And stay tuned for my next project- DIY Roman Clay!





What sheen of paint did you use? Or does it matter what sheen I use?