
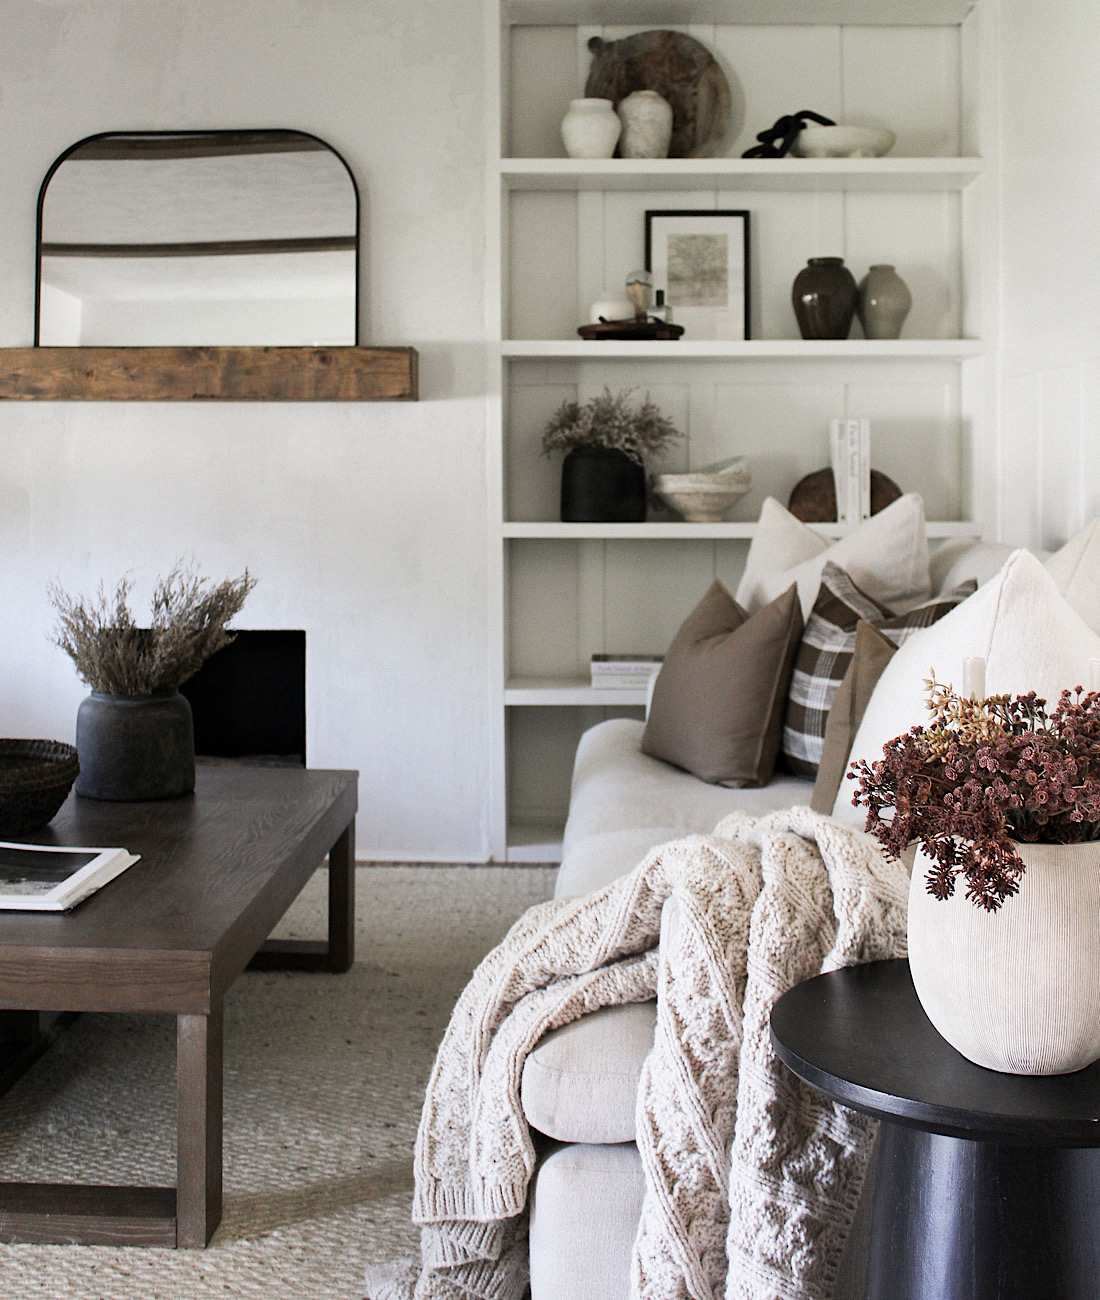
I have admired concrete fireplaces for a while now and knew our living room faux mantel would be the perfect spot to makeover creating a concrete focal point in this space. All the texture and dimension are what I love so much about concrete. It adds so much to a space! It feels very clean and modern while bringing character to our living room – which I love!

I’ve seen standard gray concrete fireplaces using Ardex Feather Finish and knew the results were incredible. However, I’ve never seen white. Ultimately, I wanted that white concrete finish to keep our space nice and bright while also popping just a little off our white board and batten walls. This far exceeded my expectations!
To start, we tore down our faux mantel – it was just framed craftsman style with a beadboard paneling inside. It was just a temporary place hold until we had time for this project! I’m so glad we MADE time before the holidays for this.
Then, we started framing using 2×4 studs we built the fireplace to the ceiling and out 14 inches. Next, we added the drywall directly over the framing. Then, for a more seamless straight corner edge we added drywall metal corner bead to each side where corners met. Tapped and mudded the seams.

*TO NOTE: wood burning & electric fireplaces can have this cement product! Cement Board is deemed noncombustible and can be used with other noncombustible materials around a fireplace. We used regular drywall as this won’t be wood burning.
Finally, it was time for concrete! We used white Ardex Feather Finish – 2:1 ratio of Ardex to water. Have to work really quickly as it dries in about 15 minutes. My husband continued to stir our bucket of feather finish while I used the spackle knife to apply it directly on the drywall. I used up and down and side to side motions just as you would spackling a wall or doing the german schmear technique.

The great thing about this is you can customize your look. Have it as smooth or as textured as you want! We only used 1 10 lb bag but could have used 2. The sides aren’t as detailed as the front, which I’m fine with since it’s not all that noticeable. We also didn’t fully mud the drywall beforehand. Had we done that more we wouldn’t have used as much Ardex. We did 2 coats, the first was just applying it more smoothly. Then, the second coat I went in for more detail and a little texture to add dimension.
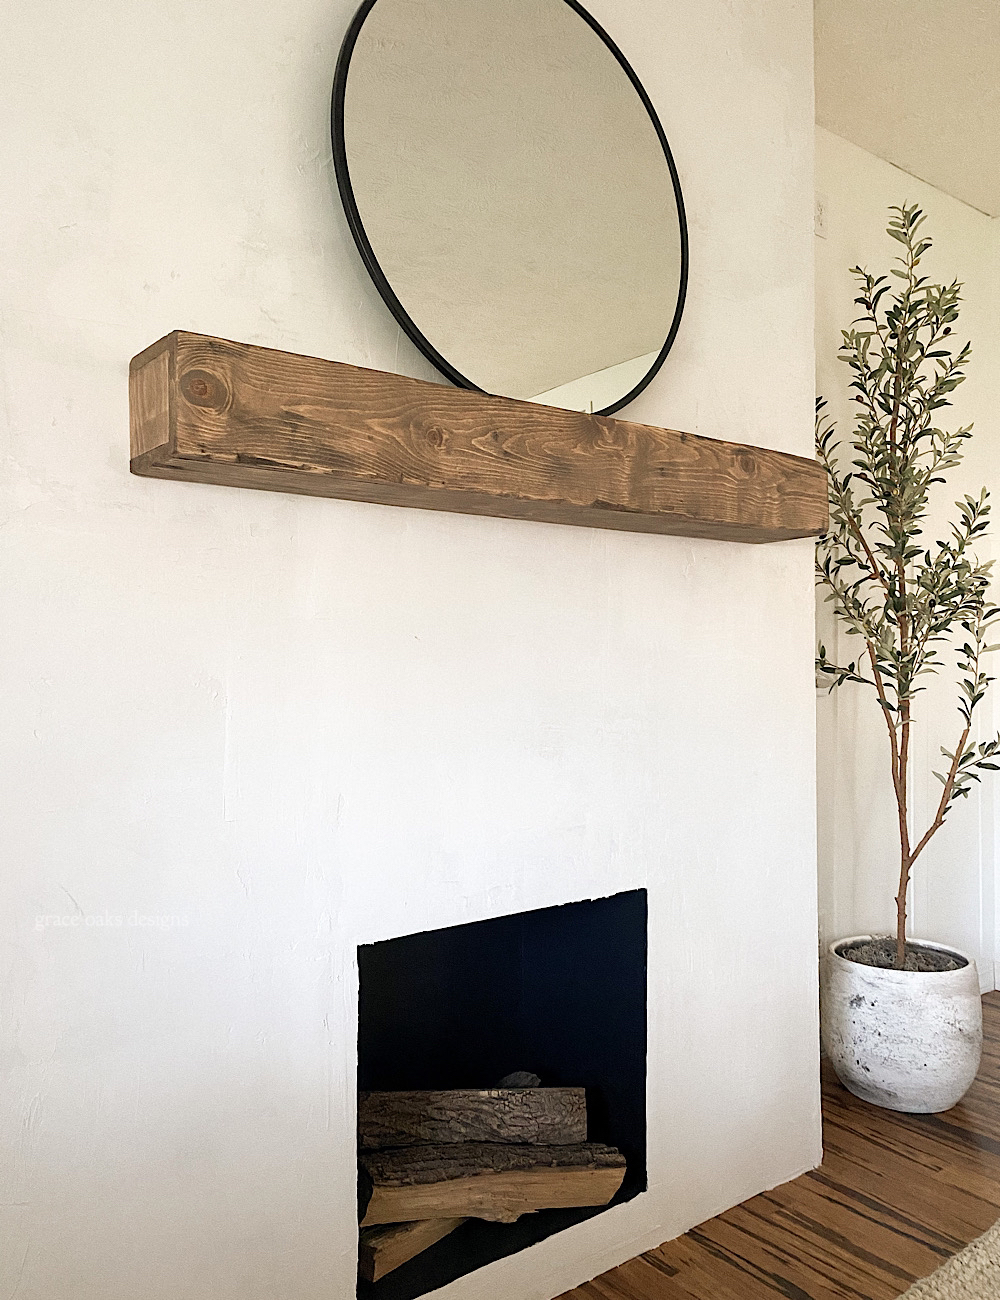
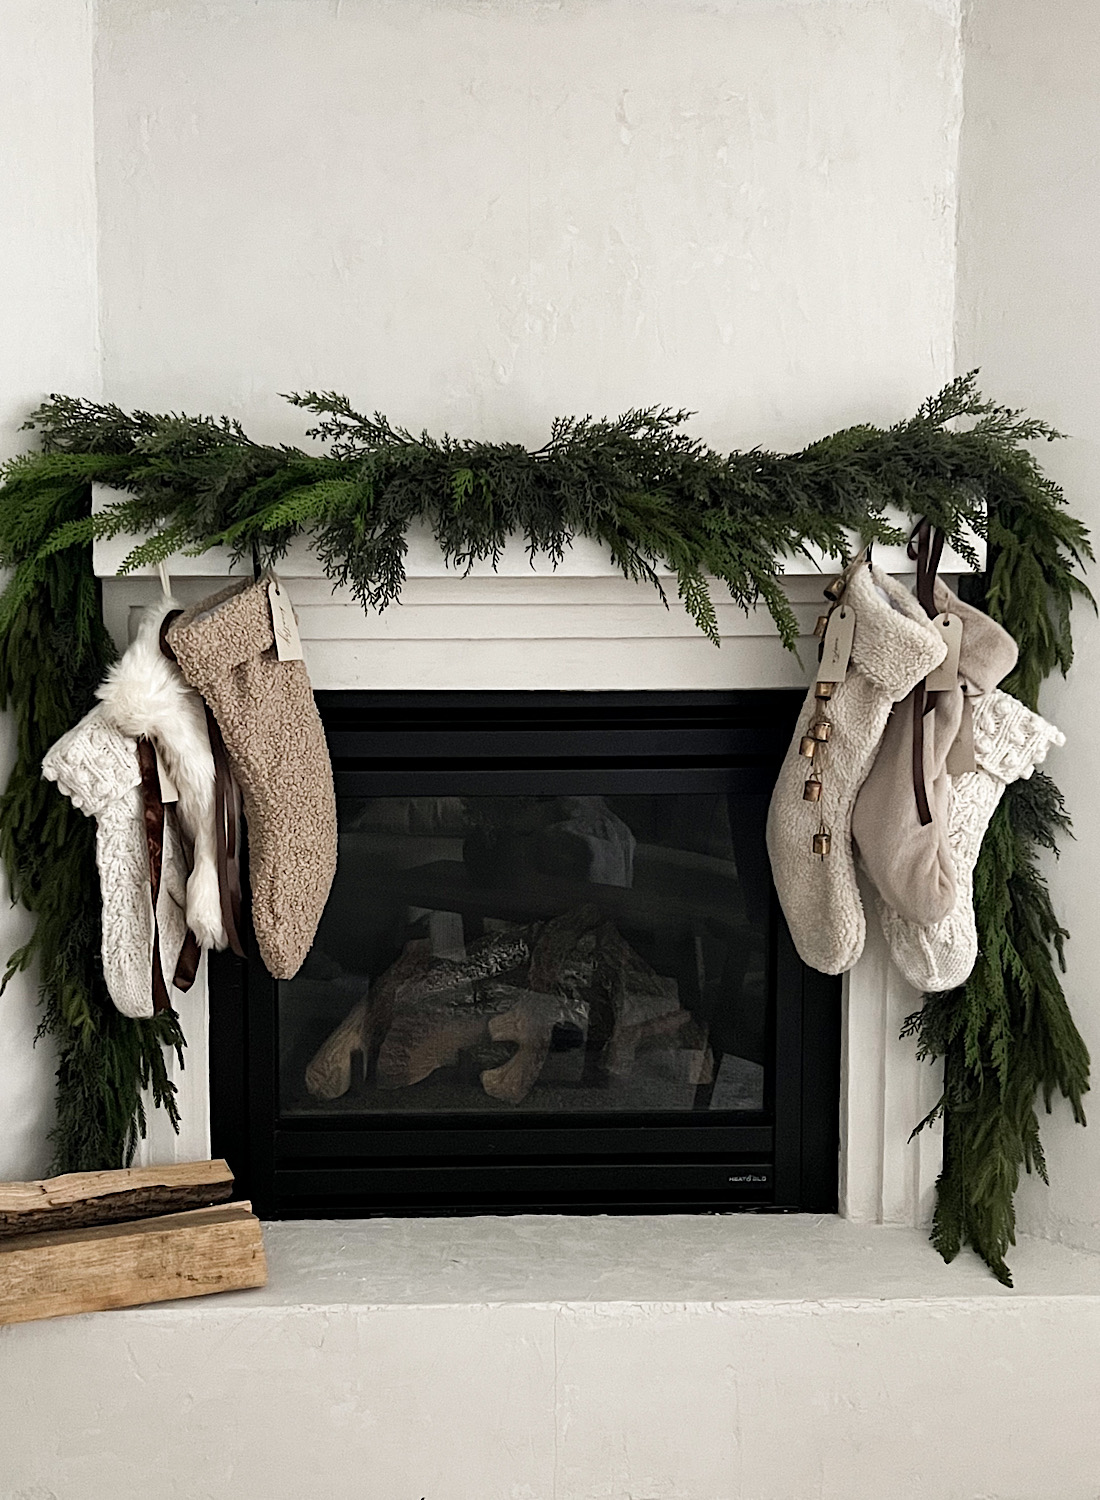
I designed this fireplace to fit an electric insert should I choose to add it down the road. Right now, I really like the look with just the wood logs. After winter I’ll use birch logs to soften the look. We kept the insert top partially open (you can’t even see it unless your head is inside) to access tv cords and to plug in the insert if we add it later. I painted the inside Sherwin Williams Tricorn Black, my favorite black!

The fireplace turned out even better than I envisioned, and the white is incredible in person. So much detail and texture. We didn’t seal it or use anything over top. I didn’t want to alter the look whatsoever. To clean it I’ll just dust with a dusting cloth.


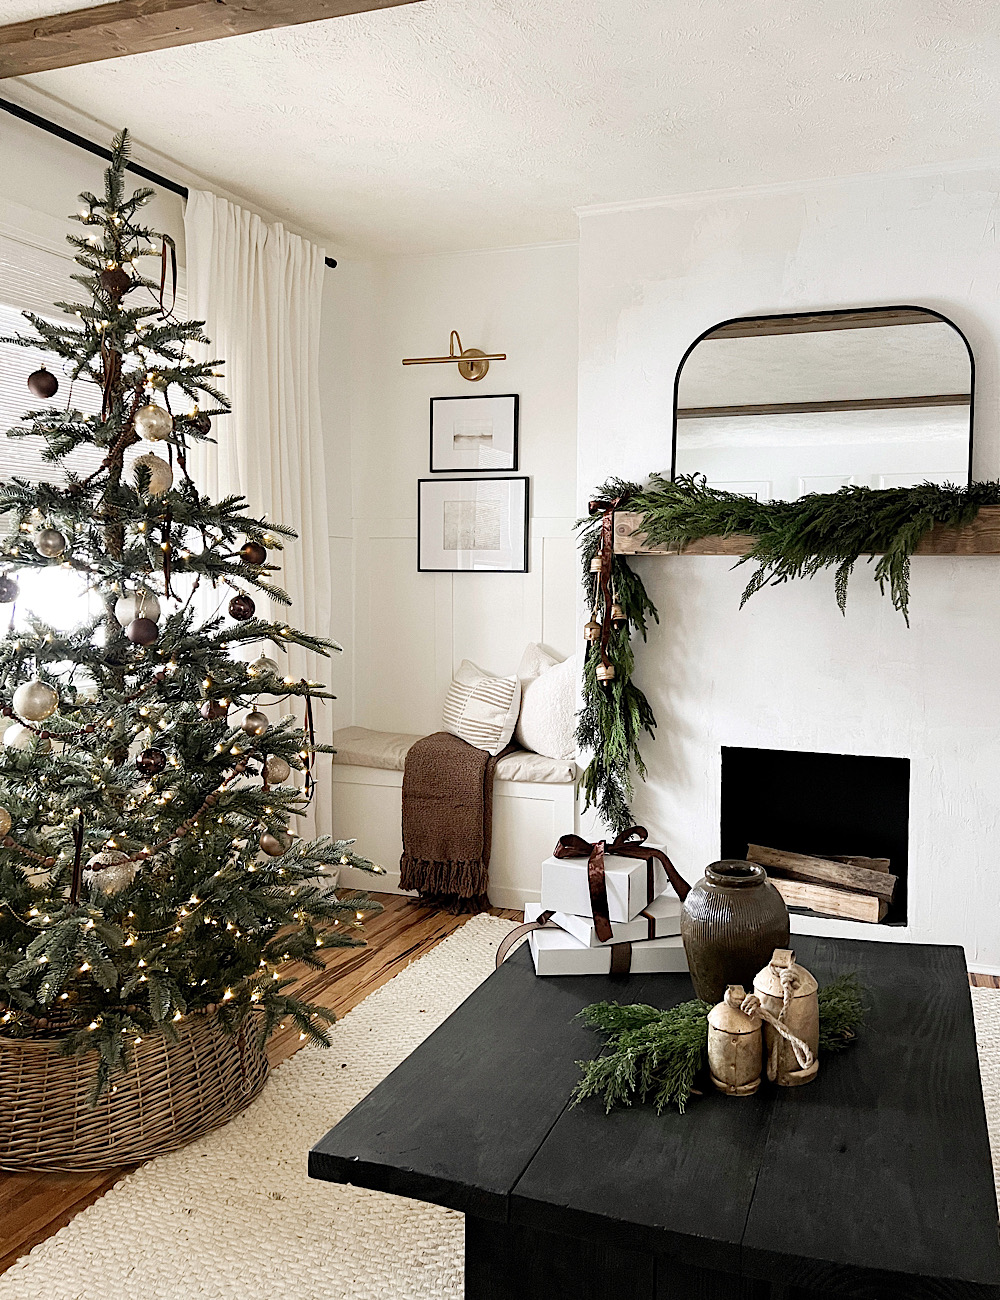
To wrap up this project we knew we needed to add a new mantel since this fireplace is completely different than what we had before. I wanted a big beam looking mantel just as we had before but not as substantial or wide. To make it we used 1×6 pine and nailed 3 sides together. Leaving one long side open to slide over top of the 2×4 bracket. I distressed the mantel once it was put together using my aging wood technique (check IG story highlights to see this in action). I use nails/screws/chain-link with a hammer and hammer it into the wood on all sides. Then, using the hand saw, jigsaw, and wire brush drill attachment to distress the wood. I stained using my custom mix stain but added Rust-oleum Flagstone. It’s a little darker than I wanted but in the same stain color family. I really like the warmth!

INSTALLING MANTEL:
First, attach the 2×4 brace length of mantel using screws. Then, slide the mantel over top, and drill directly into mantel downward into bracket near the backside.


I love the modern, clean, sleek look it gives our space. *Year later update- it looks the exact same as day 1. There’s no fading, chipping, anything. And I love it just as much! This material is fantastic and is so easy to use. If you makeover your fireplace with Ardex I’d love to see yours and share on IG stories. It’s always so fun to see your projects inspired by our DIY’s.


I absolutely love how this fireplace turned out and I plan to do something similar with mine. How did you get the lighter-colored concrete look where it almost looks white? I noticed that most people using the feather finish stuff have a normal gray color. I’d love to achieve the lighter off-white color you have!
Hi! It’s white feather finish here’s the link- https://rstyle.me/+YY9jEyjAiPgVkkiVI1nU_g There’s more details here for you- https://graceoaksdesigns.com/diy-concrete-fireplace/ Hope this helps! I’d love to see your fireplace after!
Hi!
I was just wondering is how much of the Flagstone stain you added to the custom stain mixture? I know it calls for 3/4 cup provincial, 1/2 cup weathered oak and the rest filled with water to dilute. Roughly how much Flagstone would you say you added to achieve this beautiful tone? I am staining my fireplace mantle and would love to achieve something of the same darkness!
Thanks!
Hi! I would say maybe 1/4C. I took a pass over the mantel and it was too dark with this wood with my custom mix stain. So I dumped a little to add room. Added maybe 1/4C of the Flagstone. Honestly, I would get a larger jar and fill according to recipe then adjust. Always test on a scrap piece of the same wood if possible.