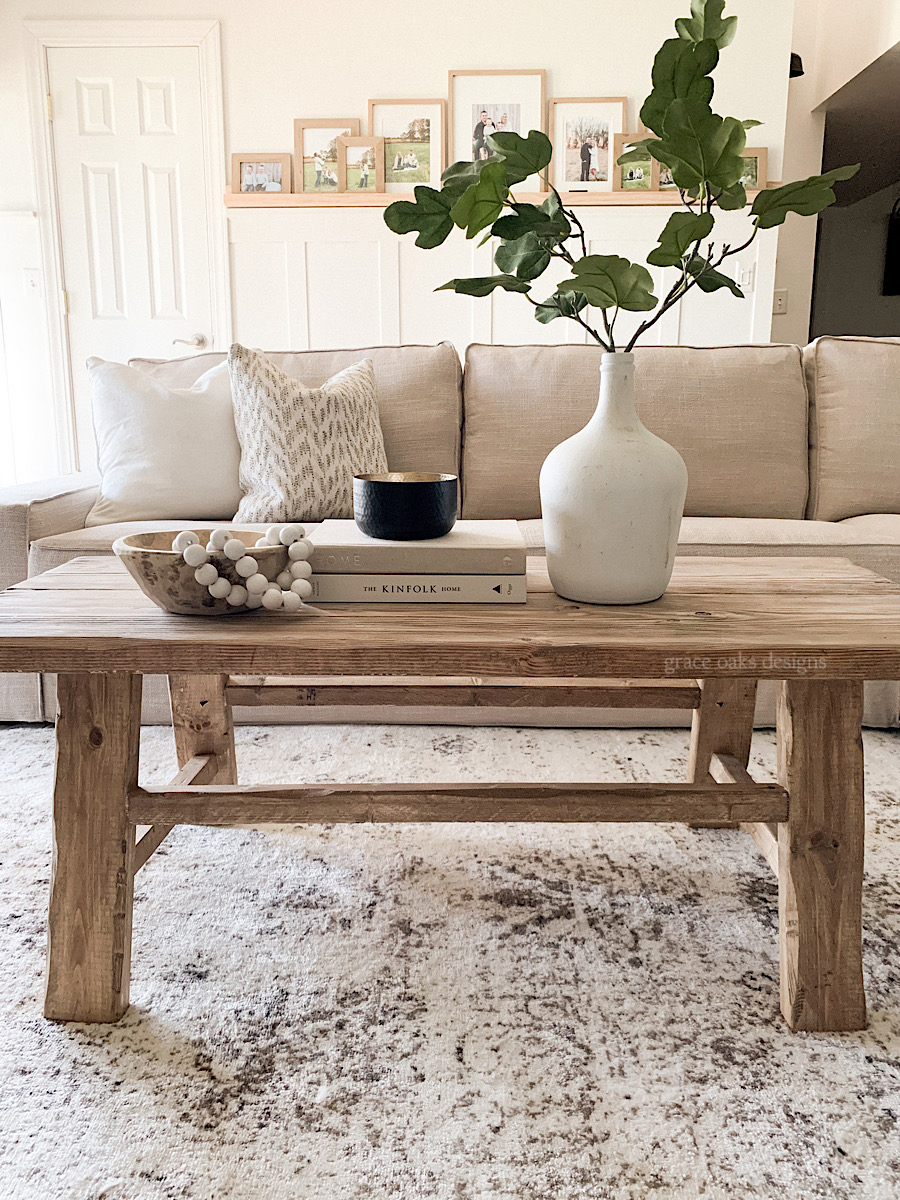
I love the look of old antique Chinese stools because they’re full of character. I’ve seen them used as accent tables, benches, and even coffee tables. The larger they are of course the pricier and more challenging they are to come by. Like most projects I knew we could make this style coffee table ourselves, and with some heavy elbow grease distress enough to pretty closely resemble the look I was after.

MATERIALS:
1 2×12 pine board
1 2×4 pine board
1 2×2 pine board
Finish of choice
Minwax polycrilic
Coarse wire brush drill attachment
Jig saw
Router/planer
3.5” ScrewsWood glue
Palm sander
Hand saw
We started with a 2×12 pine board and cut it in half lengthwise down the center, making two pieces.

Then, rip one of the long edges ¼” and repeat on the second board. A planer is easiest for this step to cut the roundness off the edges. The same can be accomplished with a router.
Once ripped, flip boards on their sides using ½” bit and drill ½” deep. Be sure to match boards up correctly and drill same into the other. Then, add the ½” flat head wood plugs. Also, clamp and glue the two boards together.

Next, cut 2×4’s to desired length for the legs. We made ours 16.5” and cut them at 10 degrees parallel. Essentially looking like this //.

Attach the legs to the table using kreg jig and pocket holes if you prefer. We attached 6” from the end of the 2×12, affix using two screws into each 2×4 leg.

Cut 2×2 to fit between the front legs and side legs on each side. On each end of the table 4” high on legs, cut the 2×2 to fit at 10 degrees perpendicular. Essentially looking like this / \. Ours was 17.”
Affix using two screws on the underside and inside the table.

On the long side of the table 9” high on legs, straight cut the 2×2 to fit. Ours was 29.5.”
Affix using two screws on the underside and inside the table.
Once the table was built, we went in and heavily distressed it. There are many ways to do this but the most authentic way I’ve found is using a few extra tools.
Start by using the jigsaw and make up and down cuts along the edges of the tabletop on all sides. Then, take it along the legs and center 2×2 brace pieces.
Next, using a small hand saw shave off chunks of 2×4 on the legs and also hit the tabletop along the long edges. This really gives the table that aged authentic look just like those beautiful Chinese stools.
We also used the wire brush dill attachment to wire brush along the table top, sides and legs. It creates grooves in the wood and will give the table an aged look. Once the stain is on it will be darker in those areas and really give it more of that authentic aged look.

Finally, I like to take screws, nails, chain link, and a hammer and beat up the tabletop and legs. I hammer the screws on their sides to indent the wood, same with nails. The chain link I’ll use the hammer and indent the wood by hammering the links. You can even use the end of the hammer to indent the wood. This really creates unique markings that the stain will soak into and create even more character to the wood.

These last few distressing steps are really critical in creating a table that looks truly aged. Of course, you can skip it but the elbow grease and extra work it took to age the wood really makes a huge difference in the overall appearance of the table.
The first project we made using this same technique was a bench. Last year we also made a stool for my son’s bedroom. You could make a stool, coffee table, side table or bench using this technique and same style. I love the look of each one!
If you use our tutorial to make one, I’d love to see your project. Send me a photo or tag me on IG – so fun to share your projects inspired by ours on IG stories.Thanks for stopping by the blog today, and I hope this tutorial helps get you creating a unique aged piece of furniture yourself!





Made this table and loved it up until I put on the pre-stain and it turned very red! Any suggestions on how to get it to be a toned down brown like yours is?
Hi! Oh no! First, it really depends on the type of wood you used to begin with and what the tones were. I used the whitest non-orange toned pine I could get. Always test on a scrap piece first and adjust the ratios of stain accordingly. I used my custom mix stain can find that post here- https://graceoaksdesigns.com/custom-mix-stain-at-home/
This is really beautiful. May I ask what color stain your chose? The color is perfect!
Hi, Courtney! I’m so glad you like it! This finish is done using my custom mix stain combo you can find on the post here- https://graceoaksdesigns.com/custom-mix-stain-at-home/
I can’t wait to try this. After you apply your custom stain, what kind of top coat do you use?
Thanks!
Hi! I use Minwax Polycrilic in Clear Matte it gives no sheen and does not yellow over time.
Hi! I want to make this beautiful table but I live in Sweden so we don’t have the same measurements.. do you know the sizes of the wood in cm? If not is it in inches you use? 🙂
Hi! Yes, it’s in inches.
Hi!
Would you recommend using the Minwax pre-stain before applying the custom stain?
Thanks!
What did you finish yours with to protect it and what color stain?
Hi there! It’s my custom mix stain. Really easy and pretty color. Be sure to test a sample first as all wood takes it differently and adjust as needed. Here’s the mix- https://graceoaksdesigns.com/custom-mix-stain-at-home/
I love this table!!! Do you mind sharing what stains you used for this finish? Thanks! Marissa
Hi! I used my custom color stain can find it here, super simple but gives a beautiful finish- https://graceoaksdesigns.com/custom-mix-stain-at-home/
[…] GRACE OAK DESIGNS . COM […]
What stain did you use?
Hi, it’s my custom mix stain you can get info here https://graceoaksdesigns.com/custom-mix-stain-at-home/
[…] Put together an aged coffee table with a unique, timeless look. Build the table using two 2×12 pine boards and two 2×4 pine boards as the frame. Once complete, customize to your style by selecting any finish of choice. Add a rustic feel with distressed paint that offers protection to preserve its durability and longevity. In no time, you’ll have a beautiful decor piece that adds both charm and character to any living room, den or man cave. graceoaksdesigns […]