
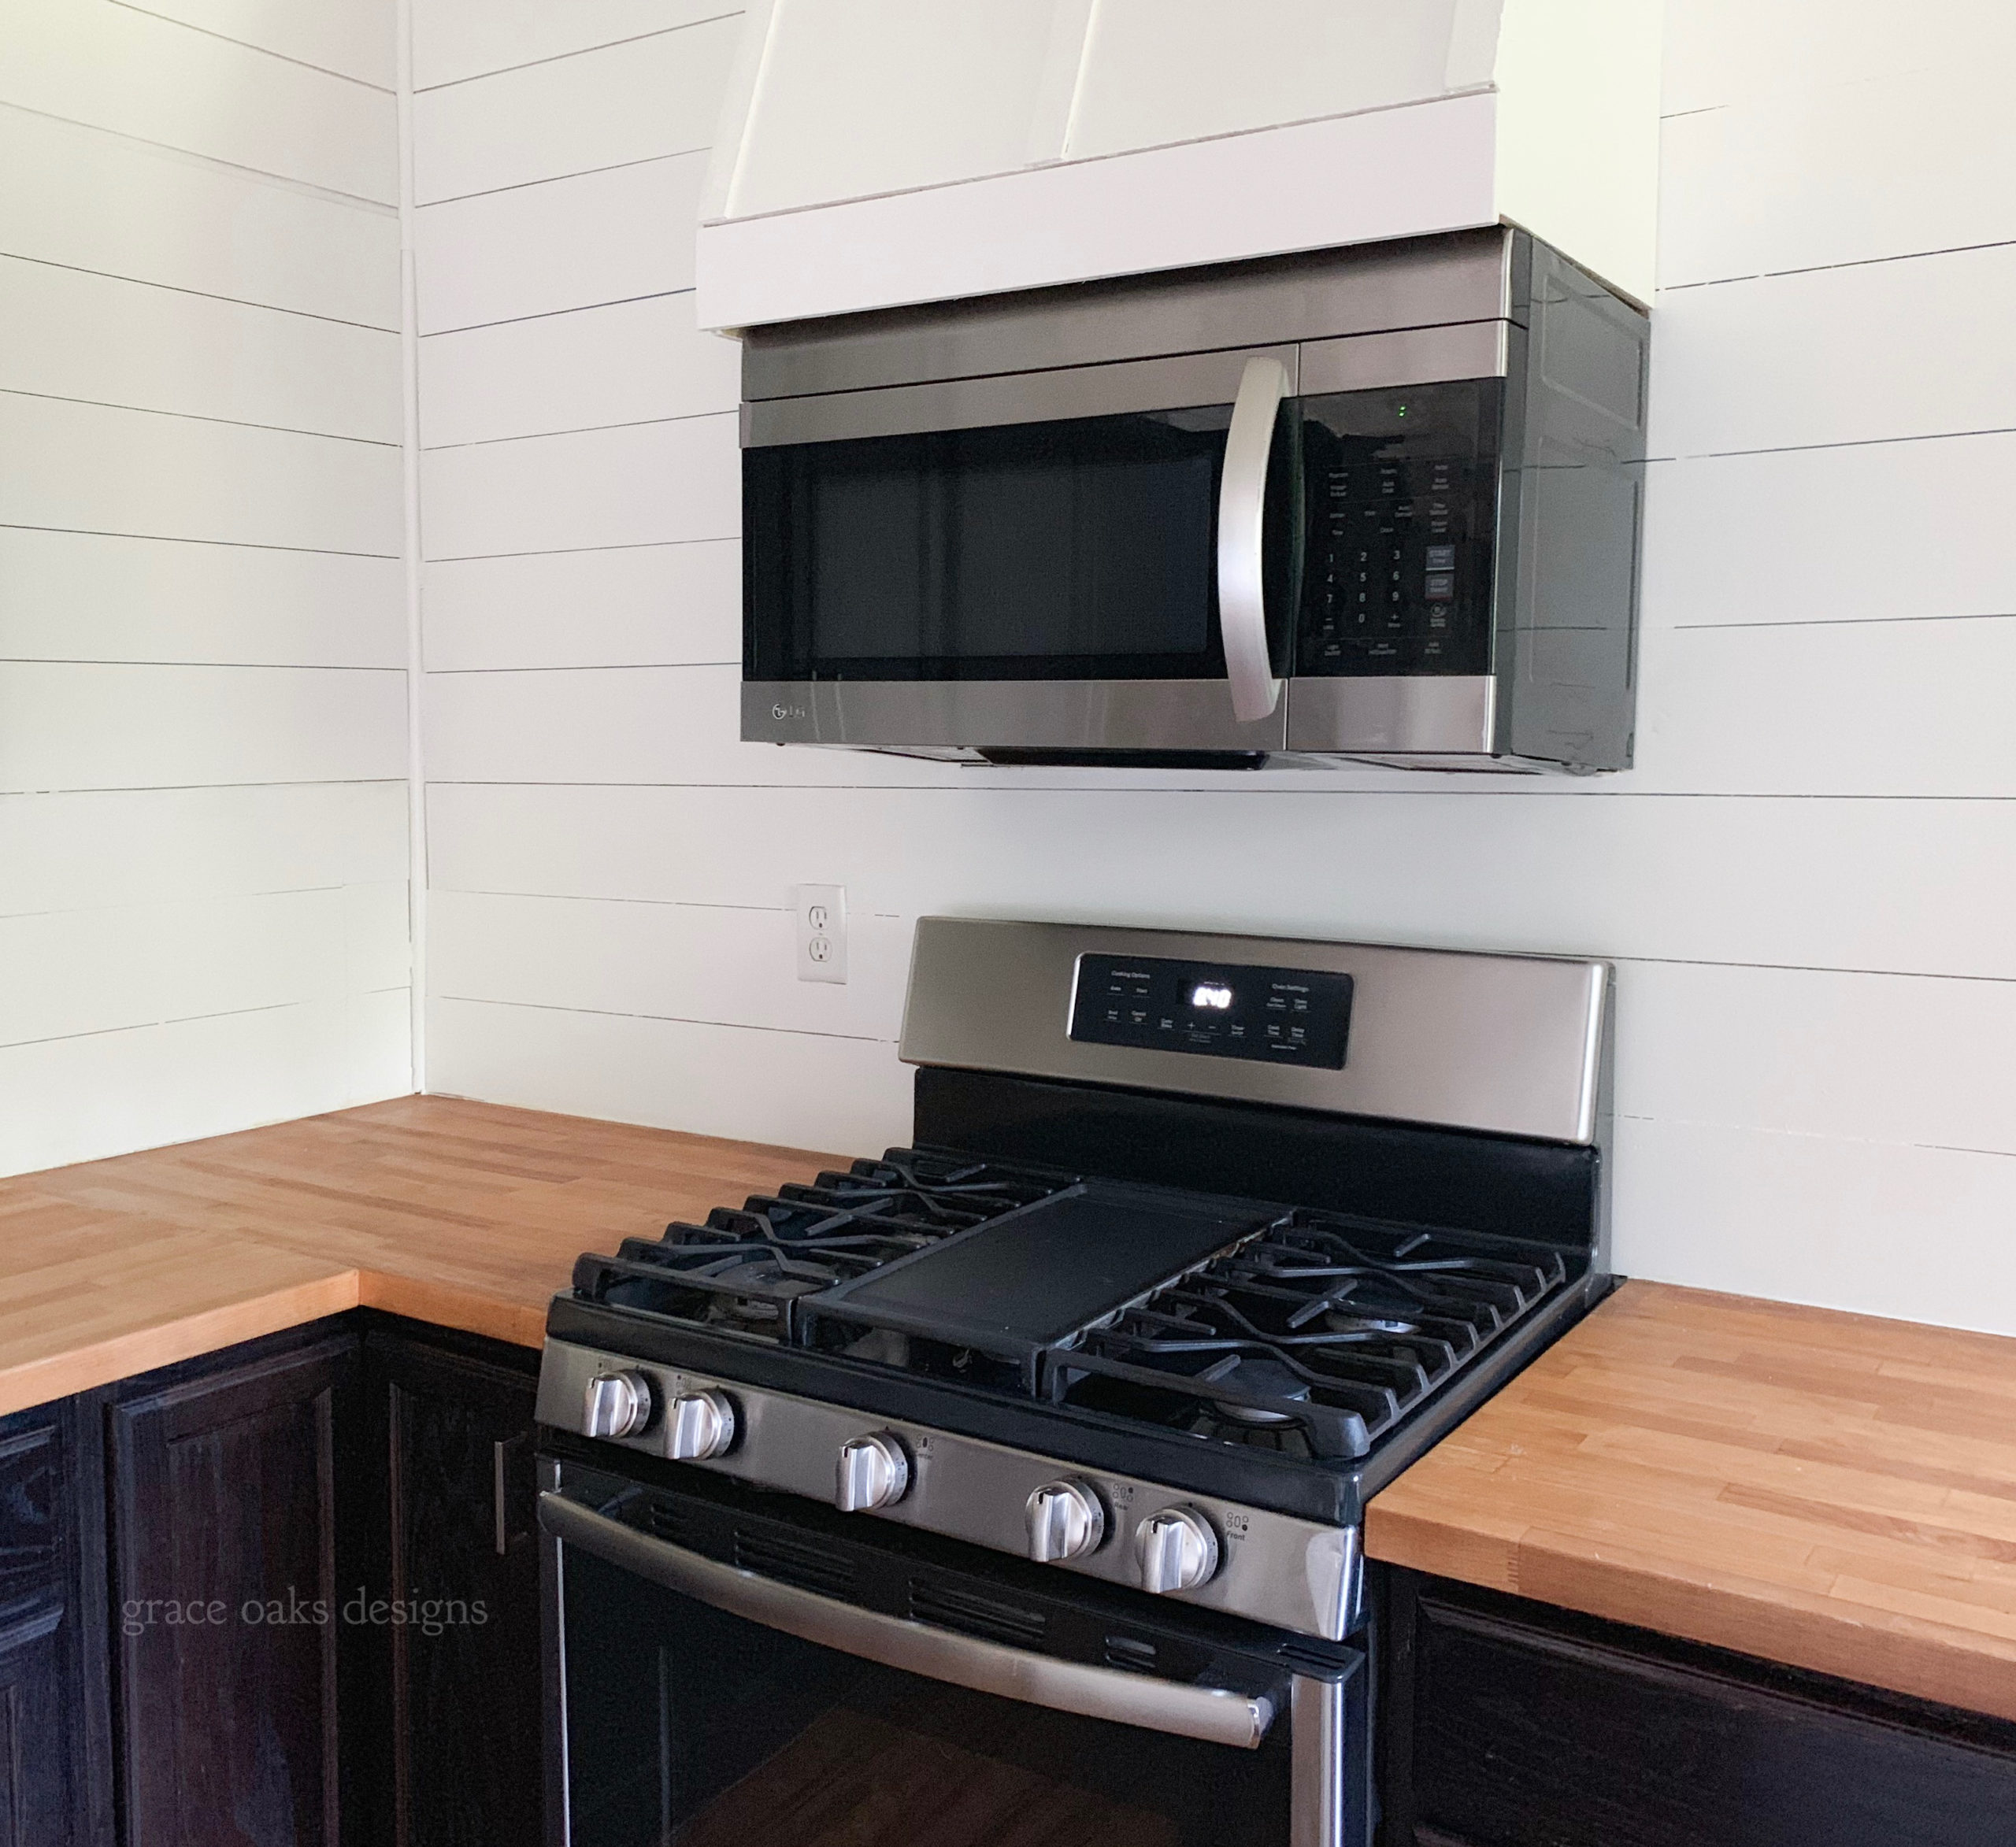
When designing our kitchen refresh there was one element, I was particularly excited to include, a faux vent hood. I wasn’t sure if we’d be able to make it work, but I was determined to try!
The only issue in our case was not having a large pantry to relocate our mounted microwave. I also really don’t like having cluttered counters, so adding our bulky microwave to the countertop wasn’t an option for us.

I researched high and low for a tutorial making a faux vent hood over a mounted microwave and came up with nada, zilch, nothing. So, my handy hubby got to work taking a thousand measurements- the space on the wall where it would go, the microwave itself, and the area between it all.

I wanted a really classic, clean and simple look since we have shiplap throughout the kitchen, I wanted to keep the hood white with a few vertical strips of wood in the center. Luckily for us we were able to construct the entire piece out of leftover materials, costing us zero dollars to create! WIN!
However, if you didn’t have scrap materials on hand, I have a rundown of what we used, and it would be pretty inexpensive to recreate. You could also easily use this same technique to make a faux vent hood without having a mounted microwave as well. Each space will be different for size and measurements plus the angels, but I will explain the basics on how we achieved a faux vent hood above our mounted microwave.
For starters we crafted a frame for the vent hood out of 2×4’s. Ours were scrap so that’s why they’re all different colors. Hey, whatever works! There’s a 2×4 that runs the length of the frame for the microwave to attach to, and we determined the size by measuring the depth and length of the microwave but also measured the height from the top of the microwave to the ceiling for the framing.

Once the frame was built, we measured the front and side pieces for plywood faces to cover the frame. We used left over plywood from our kitchen floating shelves, but inexpensive MDF would work just as well or any smooth plywood.

With the plywood faces cut (but not attached) we re-mounted the microwave on the wall and drilled the hood frame directly to the studs. It was REALLY tough attaching the microwave to the frame because both were extremely heavy, having extra hands is crucial!
After the frame and microwave were installed, we nailed the plywood faces onto the frame. Some of the cuts were a little tricky for the plywood faces so we used a jigsaw for around an angle.

Final piece of the vent hood was adding a top and bottom piece of plywood to the frame to give it a framed in look. Then, I took thin fir strips of wood the length of the center face piece and nailed the first directly in the center. Once that one was up, I then nailed the other two on each end.

The finishing touches were to fill the nail holes, sand and paint! The entire process took maybe an hour, it was a very simple build but installing took a little finagling.
I’m more than happy with how it turned out, and since it was free to make, I’m SO SO glad we took the time to figure out a way to make it happen! It has such an impact, even being faux and not serving any purpose. It’s truly a beautiful part of our kitchen and I think makes our open shelving look that much better!

If you find yourself in the same situation wanting to make a faux vent hood while having a mounted microwave, I hope this tutorial is helpful in constructing your own! And it would be very inexpensive to make being crafted out of 2×4’s, MDF or plywood!
If you happen to use my tutorial and make a faux vent hood, I’d love to see yours! Tag me on Instagram or send me a photo, I love to share your creations from my DIY’s!


Did your microwave connected with hood? If so, whenever your microwave is not working, how can you get it out?
Hi! It connected to the microwave. The microwave was installed to the wall and hood was built around it. We could unscrew from the side panel to take that piece of wood off and access it. We never had to though.
Hello. Would your husband consider making these for sale?
Hello! I’m sorry we do not but thank you so much for your interest!
I understand that measurements will be different depending on size of microwave however do you remember what the size difference is in yours between the top and bottom by chance? Like our microwave is 30 inches wide however how did you measure how small to go for the top of the hood?
Looks nice. Was wondering what your cut list was. Trying to recreate for my house. I know cuts will be different based off space and microwave but was trying to figure out upper blocking. Thanks
This is amazing! Would also be super cool if the front could open up to create functional storage!!
Price