
There’s only two weeks left of the spring One Room Challenge sponsored by Better Homes and Gardens, sure crazy how quickly this project has flown by.
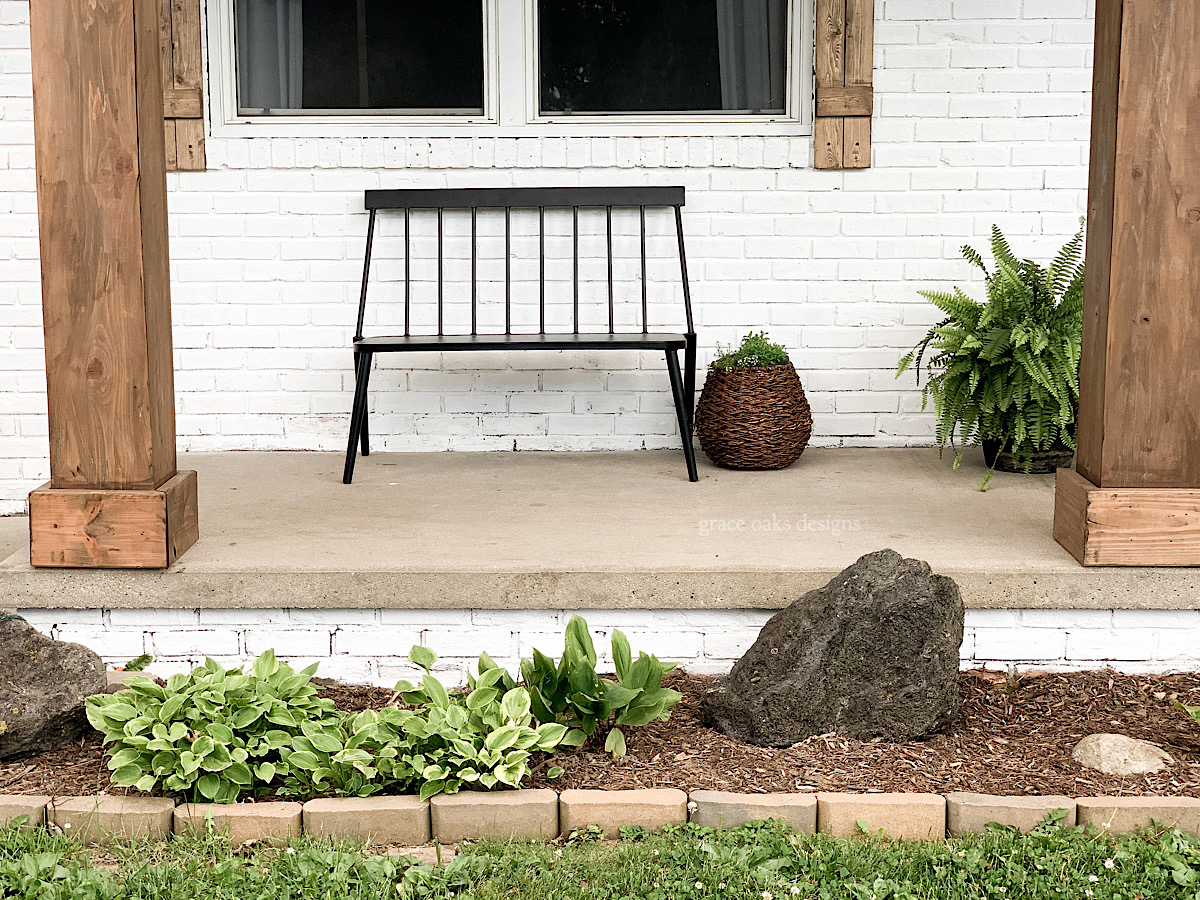
This week we focused on the columns on our porch and patio, shutters, and our garage door makeover. All the best easy, inexpensive, and simple curb appeal projects! Really looking to up the curb appeal and add instant value to your home? Add wood shutters, wrap columns, make flower boxes, update paint – really easy things that don’t take a ton of time either are great starting points.

COLUMNS
On the patio we completely tore those basic wrapped columns down and reworked them. Added a 2×4 running on the front and back of the column to stabilize the new wood we’ll be wrapping around it.

I chose 1” boards for our patio because these posts were smaller than our porch, and the thinner wood looked best. If you have a bigger home and want a more substantial look 2” boards would look great too (I did this on our porch). We took 2 1×10 and 2 1×8 to wrap the posts, starting with a 1×10 cut to length of the post in the front, then joining it on one side with a 1×8, and continuing around with a 1×10 in back and the last 1×8 on the opposite side. We simply nailed them up with the brad nails all across.

To add the craftsman detail along the top and bottom we cut a 1×8 to the length of the board both ends at 45-degree angles perpendicular. Total of eight pieces per column, four top and four bottom. Nail first one up and meet each angle tightly and continue nailing up around the top and bottom of the column.

On the porch we did the same style just a bit of a different look. For starters, we sanded down our columns on the porch since the cedar was still in good condition. I did choose a thicker wood to wrap the top and bottom, extending them out and giving it a more craftsman style. I chose 2×8 boards to frame out the top and bottom of the columns since these are wider than our patio columns, I love the thicker more substantial look here.

For the porch we have four total columns, so we found it easiest to cut an end of 2×8 at 45 degrees, flip board over and measure length, then cut at 45 degrees. Continue for eight total pieces on each column to wrap the top and bottom.


Nailed the new wrap around up and stained it all Behr Semi-Transparent Waterproofing Stain & Sealer in Cordovan Brown, the same color as our patio/deck furniture. One thing to note we did not use cedar boards for any of this besides what was already wrapped on our porch columns. I’m not worried about this wood because I used an exterior stain that has a sealant in it. I also added a coat of spar outdoor urethane over top for extra protection.

SHUTTERS
When we started making the shutters, I liked the look of 3 1×4 boards running up and down with a simple cross wood piece along the top and bottom 1/3 of the way down. I still do. However, after painting our brick I realized I didn’t want to cover that much of the brick up. Again, if you have a larger home or more brick work and don’t mind this size looks fantastic. Also, you could substitute wider boards for a wider shutter if you prefer.

So, after realizing this issue we simply took one board away and I love how simple and minimal they look now. Still modern and have a craftsman touch that I’m seeking, but a thinner approach which I appreciate on our home to expose more of the brick.
To start, we measured the length of our windows and cut 6 1×4 boards to that size length. Alternately, you could make them less wide like we have now and only cut 4 total boards, two for each side of the window.

Then, cut another 1×4 to the length of the two or three boards running across the width. We used a nickel to space the boards in-between each other for a bit of spacing as we nailed the cross board on using 1 ¼” nails.


They are not super sturdy just being nailed together. However, when hung on the house drilling through the cross board to the house using two screws on each cross board will make it efficiently secured.
I sanded them down and stained the same as the columns. Ours aren’t hung just yet but we’ll use a concrete drill bit and screws to drill through the brick. I plan to use a little black paint to touch up the screws and they’ll hide well into the dark stain.

In the beginning I really didn’t think I had enough projects to pull me the length of the challenge. Here we are two weeks out from the full reveal and I’m feeling a little behind. I’m so glad we pushed ourselves to lump all these smaller projects together for our big exterior refresh and really knock it all out.


Beautiful! Was the wood you used to wrap your porch columns rough or smooth timber?
Hi! Thank you! It was Cedar. We used smooth pine for the 2x boards along the top and bottom.
Would you mind to share the stain color?
Hi there! It’s Behr exterior stain semi-transparent in Cordovan Brown
So you mentioned a garage door in the post. What color did you do that?
Hi! Love your design. Could you tell me the color of the shaker shingle on your gable please?